Magnetic field measurement and magnetic measured variables
Magnetic field strength, remanence, permeability, magnetic flux - what is that actually?
Various measured variables can be determined in connection with magnets. Because it often leads to confusion, here is a brief overview. For a precise definition and the physical basics, we ask you to look up the specialist literature.
Magnetic field strength (H)
The unit of measurement for the strength of the magnetic field is A/m (because of the results, A/cm or kA/m are more commonly used), older also Oersted (Oe). Because the magnetic flux density B, measured in Gauss (Gs) or Tesla (T), can be converted using a constant factor, magnetic field strength and flux density (and thus the units A / cm, kA / m, Oe, Gs, T) can be used alternately.
Devices for measuring the magnetic field strength are called magnetometers, magnetic field meters, gaussmeters or teslameters.
Remanence / residual magnetism
Remanence or residual magnetism is a special consideration of the magnetic field strength, the remaining magnetic field strength after the influence of a magnet or after a demagnetizing process.
The remanence can also be measured by magnetic field meters, gaussmeters and teslameters.
Permeability
The relative permeability (µr) is a parameter of how strongly a substance can be magnetized. The value plays an important role, especially with stainless steels. Another term used for this is magnetic conductivity. There is no unit of measurement, µr is dimensionless. Simple measuring devices examine the range between µr = 1 (permeability of the vacuum) to 2.
A permeability measuring device from our company is the FerroPro compact.
Magnetic flux
The magnetic flux (Φ) describes the total power of a magnet and can be measured with a Fluxmeter in a coil. The unit of measurement is the volt second (Vs), also Weber (Wb) or earlier Maxwell (Mx).
A Fluxmeter is required to measure the magnetic flux. Compared to hand-held devices for measuring magnetic fields or permeability, these devices are more complex; they are laboratory devices with a connected Helmholtz torque coil.
Where does unwanted magnetism on steel parts come from?
Steel parts that are magnetic can create problems in further processing. The component cleanliness is reduced. For example, iron filings stick, which is why tools wear out. Or sensors are disturbed. Where does this magnetism come from?
The cause cannot be given in general terms. Steel parts can be slightly magnetized by the earth's field, with the elementary parts of the material aligning themselves in the direction of the magnetic field. It can be observed, for example, that a steel rod is easily magnetized by vibration during transport.
However, if you use magnetic lifting tools, which are universally popular and are gentle on materials, you have a possible reason for residual magnetism. A first step: Determine the residual magnetic field strength. Is it within your tolerance levels? If not, you either have to demagnetize the parts or do without the magnetic crane. It is best to demagnetize before installing the finished part in order to minimize transport influences on the remanence.
How strong is a magnetic field? - Measurement of the magnetic field strength
The question is asked to determine the peak value of a magnet or a residual magnetism. Devices that fulfill these tasks are called magnetometers, magnetic field measuring devices, Teslameter or Gaussmeter. A constant field without a pole change is considered here.
When measuring you have to explore: where are the poles? In which direction does the probe measure the most? Does rotating or tilting the probe cause a change? In this way, each individual magnet can be examined for its maximum field strength.
The position of the measurement and the design of the probe are decisive for the measured value
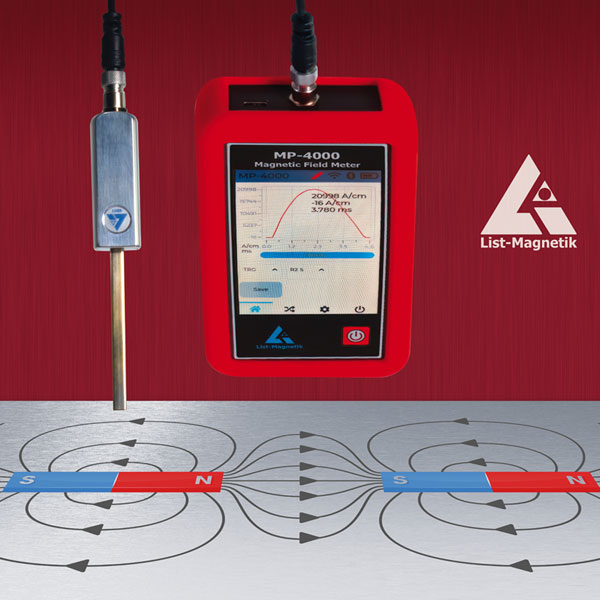
The field lines of a magnetic field run from the north pole to the south pole of the magnet. In the case of a bar-shaped magnet e.g. the poles are mostly at the two ends. That is where the field is strongest. Depending on the shape of the magnet, the field lines run differently; in the horseshoe magnet they are parallel within the arch. The closer you measure the magnetic field strength to the pole, the higher it is. In the probe, a so-called Hall sensor records the Lorentz force, from which the field strength is calculated. The closer this Hall sensor comes to the pole, the more force acts. Different probe designs (axial, transversal) have different installation forms of the Hall sensor and lead to different measured values.
How strong is a magnet overall? - Measurement of the flux
Low Magnetism - What are Permeability and Remanence?
To measure magnetic fields, to measure remanence - what do you need?
Measuring devices and probes
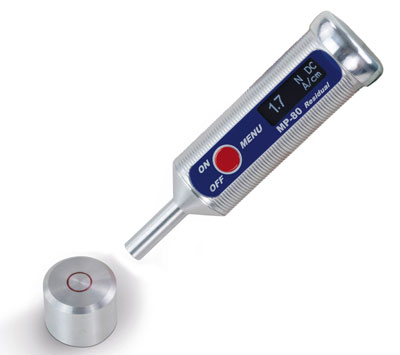
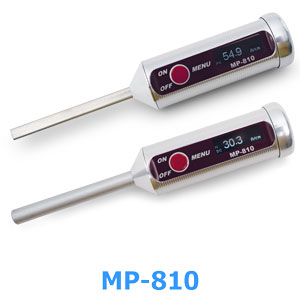
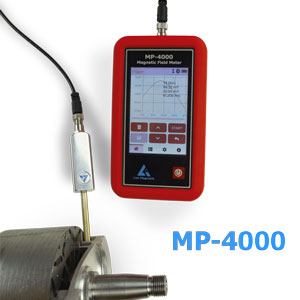
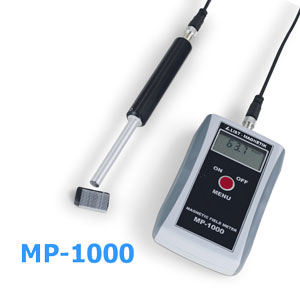
In which units do you have to measure magnetism? Depending on the device, Gauss (Gs) or Milli-Tesla (mT) can also be displayed in addition to the basic unit A/cm. The important question is what maximum field strengths can be expected. List-Magnetik has a selection of devices and probes for every purpose - whether one-hand device, whether with a separate probe or laboratory device. The magnetic field meters MP-810, MP-1000, MP-4000 should be mentioned at this point. |
Magnetic Field Meter / Gaussmeter |
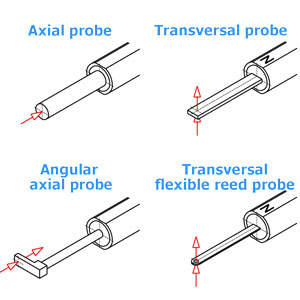
What is the difference between axial and transversal probes?
Axial probes measure in the direction of the probe lance. Transversal probes measure at an angle of 90° to the probe. Transversal probes are more suitable for measurements in cavities or narrow pipes. Ultimately, it can be said that the transversal probe is the more universal tool. Because practically all measurements of the axial probe can be carried out transversally. One advantage of the List-Magnetik axial probe is the 2mm distance between the Hall sensor and the probe cap. In ball bearing production, this value has become the de facto standard for the probe. |
What is a calibration standard and what is it useful for?
A calibration standard is a reference magnet - a permanent magnet that always shows the same value when the same probe is in the same position. With this you can be sure that the probe is still working correctly. In the case of precision calibration standards, the axial or transversal probe is held in the opening in such a way that it cannot shake. In the case of reed probes, the probe would be damaged, so you have to check with the simpler lay-on calibration standards. The combination of device, probe and standard forms a unit that is calibrated and certified together. The use of a probe on a calibration standard that has been coordinated with another probe can result in the reference value deviating minimally. This is because probes cannot always be built exactly the same. However, this deviation is always constant. |
Quality inspection of a permanent magnet
Why does the field strength deviate from the manufacturer's specifications?
A magnet manufacturer usually supplies a so-called B-H curve for quality assurance, in which both the maximum B value for the magnetic field strength and an I_Hc value for the demagnetization resistance are specified. These values are recorded in a special measuring device with a yoke, whereby the magnetic circuit does not have any air gaps. This measuring device is called the Permagraph, is very complex and usually too cost-intensive for normal users.
If the user wants to measure the maximum magnetic field strength with a magnetic field measuring device (e.g. MP-810A, MP-1000, MP-4000) for control purposes, he will determine a lower value. Why is that? The measured strength of a magnetic field depends essentially on two factors: position and distance. Magnetic fields are inhomogeneous outside of the magnet in air; different measurement distances result in different measurement values. The user cannot achieve the optimal condition at the manufacturer, a magnetic circuit without an air gap, with a magnetic field measuring device.
In order to measure the value of a magnet specified by the manufacturer, the identical measuring equipment and the identical position would be necessary. Usually neither is known. In addition: There is no standard about the measuring distance of the sensor in the probe to the contact surface of the probe. It is therefore common for different measuring probes that the measured values do not agree with one another.
To check the quality of a permanent magnet, it makes sense to use your own measuring equipment to determine the maximum strength of a newly purchased magnet. For periodic monitoring it is sufficient to observe the change over time. If constant measurement results are obtained in regularly performed measurements, the force of the magnet is unchanged.
A better option for a measurement is to measure the flux value with the help of a fluxmeter with a Helmholtz coil, in which the magnet to be measured is inserted. Here you are independent of the measuring distance and receive a comparative measurement over the entire magnet volume, instead of a point measurement on a magnetic pole. However, this method is more expensive and impractical with built-in magnets.