List-Magnetik Coating Thickness Meters
From the question to the right device
|
Standard devices and standard probes are supplemented by individual solutions. Our technicians can design a suitable solution for your measurement problem. |
||
|---|---|---|
|
Coating thickness gauges for measurements on steel and iron With the magnetic induction measuring method according to ISO 2178 measurement of insulating layers made of paint, varnish, plastic, rubber, ceramic and galvanic coatings (except nickel). That is, all non-self magnetic layers over a steel layer. |
||
|
TOP-CHECK 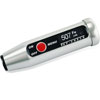 |
TOP-CHECK Ferro-1000 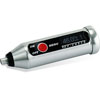 |
MEGA-CHECK 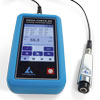 |
| For measuring paint, varnish, plastic and galvanic coatings on steel (ISO 2178). Measuring probe: can be swiveled by 90°. |
For measuring paint, varnish, plastic and galvanic layers on steel (ISO 2178). With spring-loaded measuring probe. |
Depending on the probe selected, measurement of paint, varnish, plastic and galvanic layers on steel, measurement of insulating layers on non-ferrous metals with automatic detection of the base material. Measuring probe: Measuring range depending on the probe on steel and iron up to 30 mm (30,000 µm). |
| more info | more info | more info |
|
Coating thickness gauges for measurements on aluminum and stainless steel Measurement of insulating layers using the eddy current method on non-ferrous metals such as aluminum, brass, copper, bronze and non-magnetic stainless steels in accordance with ISO 2360. This means that all non-electrically conductive / non-metallic layers on all types of metals can be measured |
||
|
TOP-CHECK  |
||
| For measuring insulating layers on non-ferrous metals (ISO 2360) with automatic detection of base material. Measuring probe: can be swiveled by 90°. Model Dual |
Depending on the probe selected, measurement of paint, varnish, plastic and galvanic layers on steel, measurement of insulating layers on non-ferrous metals with automatic detection of the base material. Measuring probe: Measuring range depending on the probe on NFE metals up to 2 mm (2000 µm). With probe DX52-D or DX52-DP. |
|
| more info | more info | |
|
Coating thickness gauges with combined probes Measure both FE metals and NFE metals with one probe without switching or plugging. The probe detects which subsurface is present and selects the measuring method (magnetic or eddy current) itself. |
||
|
TOP-CHECK  |
MEGA-CHECK  |
|
| For measuring paint, varnish, plastic and galvanic coatings on steel (ISO 2178). For measuring insulating layers on non-ferrous metals (ISO 2360) with automatic detection of base material. Measuring probe: can be swiveled by 90°. Model Dual |
Depending on the probe selected, measurement of paint, varnish, plastic and galvanic layers on steel, measurement of insulating layers on non-ferrous metals with automatic detection of the base material. Measuring probe: Measuring range depending on the probe on steel and iron up to 5000 µm, on NFE metals up to 2000 µm. With probe DX52-D or DX52-DP. |
|
| more info | more info | |
|
Coating thickness measuring devices with swivel probes Measurement with an angled probe, up to 90°, for example under beams, in cavities, in bores. Everywhere that a straight probe cannot reach. |
||
|
TOP-CHECK  |
MEGA-CHECK  |
|
| For measuring paint, varnish, plastic and galvanic coatings on steel (ISO 2178). For measuring insulating layers on non-ferrous metals (ISO 2360) with automatic detection of base material. Measuring probe: can be swiveled by 90°. |
Depending on the probe selected, measurement of paint, varnish, plastic and galvanic layers on steel, measurement of insulating layers on non-ferrous metals with automatic detection of the base material. Measuring probe: Measuring range depending on the probe on steel and iron up to 2 mm (2000 µm), on NFE metals up to 2000 µm. With probe DX5-FP or DX52-DP. |
|
| more info | more info | |
|
Layer thickness gauges with external probes The probe is attached to a 80 cm long cable. The probe is easy to replace, and the cable can also be replaced separately if it is defective. An external probe is advantageous if the result cannot be read directly on the integrated measuring device. |
||
|
MEGA-CHECK  |
||
| Depending on the probe selected, measurement of paint, varnish, plastic and galvanic layers on steel, measurement of insulating layers on non-ferrous metals with automatic detection of the base material. Measuring probe: Measuring range depending on the probe on steel and iron up to 30 mm (30,000 µm), on NFE metals up to 2 mm (2000 µm). |
||
| more info | ||
|
Coating thickness gauges and anodized coating Measurement of the anodized layer on anodized aluminum. Recommended from 3 µm layer thickness. |
||
|
TOP-CHECK  |
MEGA-CHECK  |
|
| For measuring insulating layers on non-ferrous metals (ISO 2360). Measuring probe: can be swiveled by 90°. Model Dual |
Depending on the probe selected, measurement of paint, varnish, plastic and galvanic layers on steel, measurement of insulating layers on non-ferrous metals with automatic detection of the base material. Measuring probe: Measuring range depending on the probe on NFE metals up to 2 mm (2000 µm). With probe DX52-D or DX52-DP. |
|
| more info | more info | |
|
Layer thickness gauges for measuring galvanization Measurement of the galvanization thickness on steel. Recommended from 3 µm layer thickness. |
||
|
TOP-CHECK  |
TOP-CHECK Ferro-1000  |
MEGA-CHECK  |
| For measuring paint, varnish, plastic and galvanic coatings on steel (ISO 2178). Measuring probe: can be swiveled by 90°. |
For measuring paint, varnish, plastic and galvanic layers on steel (ISO 2178). With spring-loaded measuring probe. |
Depending on the probe selected, measurement of paint, varnish, plastic and galvanic layers on steel, measurement of insulating layers on non-ferrous metals with automatic detection of the base material. Measuring probe: Measuring range depending on the probe on steel and iron up to 30 mm (30,000 µm). |
| more info | more info | more info |
|
Layer thickness gauges for duplex measurement Determine two values with a single measurement: paint layer over galvanized steel and the thickness of the galvanization. The galvanization should be at least 60 µm thick. The measurement takes place in one step, you get two display values for the paint layer and for the zinc layer. |
||
|
MEGA-CHECK  |
||
| Depending on the probe selected, measurement of paint, varnish, plastic and galvanic layers on steel, measurement of insulating layers on non-ferrous metals with automatic detection of the base material. Measuring probe: Measuring range depending on the probe on steel and iron up to 5000 µm, on NFE metals up to 2000 µm. With probe DX52-D or DX52-DP. |
||
| more info | ||
|
Coating thickness gauges for measurements in pipes How deep inside can you measure an inner coating of a pipe? With tangential measurement direction, with probes that can measure a few centimeters into the pipe, or with a telescopic rod over 3 meters. |
 Read more about this here Read more about this here |
|
|
TOP-CHECK Ferro-1000  |
MEGA-CHECK  |
|
| For measuring paint, varnish, plastic and galvanic layers on steel (ISO 2178). | Depending on the probe selected, measurement of paint, varnish, plastic and galvanic layers on steel. Measuring probe: Measuring range depending on the probe on steel and iron up to 30 mm (30,000 µm). With probes DX1-FT or DX6-FT up to 8 cm. With probe DX30-F and telescopic rod up to 3 meter. |
|
| more info | more info | |
|
Layer thickness gauges for measuring the thickness of layers in the millimeter range What is the maximum thickness of the layer? A thickness of up to 3 cm is possible on steel. But the normal probes are also designed for a few millimeters. |
||
|
TOP-CHECK  |
MEGA-CHECK  |
|
| For measuring paint, varnish, plastic and galvanic coatings on steel (ISO 2178). For measuring insulating layers on non-ferrous metals (ISO 2360) with automatic detection of base material. Measuring probe: can be swiveled by 90°. Up to 5 mm on steel, 2 mm on non-ferrous metal. |
Depending on the probe selected, measurement of paint, varnish, plastic and galvanic layers on steel, measurement of insulating layers on non-ferrous metals with automatic detection of the base material. Measuring probe: Measuring range depending on the probe on steel and iron up to 30 mm (30,000 µm), on NFE metals up to 2 mm (2000 µm). Up to 30 mm on steel, 2 mm on non-ferrous metal. |
|
| more info | more info | |
|
Layer thickness gauges for the measurement of complex layers This means layers that are to be measured on very uneven ground: corrugated sheet metal, gray cast iron, sandblasted beam. You can achieve high precision with a probe that adapts to the surface. |
 Read more about this here Read more about this here |
|
|
TOP-CHECK Ferro-1000  |
MEGA-CHECK  |
|
| For measuring paint, varnish, plastic and galvanic layers on steel (ISO 2178). With spring-loaded measuring probe. |
Depending on the probe selected, measurement of paint, varnish, plastic and galvanic layers on steel, measurement of insulating layers on non-ferrous metals with automatic detection of the base material. Measuring probe: Measuring range depending on the probe on steel and iron up to 1000 µm. With probe DX1-F |
|
| more info | more info | |
|
Coating thickness gauges for small and narrow measuring points How much space do you have to attach the probe? You need a special probe for very small areas, for tight curves. |
||
|
TOP-CHECK Ferro-1000  |
MEGA-CHECK  |
|
| For measuring paint, varnish, plastic and galvanic layers on steel (ISO 2178). With spring-loaded measuring probe. |
Depending on the probe selected, measurement of paint, varnish, plastic and galvanic layers on steel, measurement of insulating layers on non-ferrous metals with automatic detection of the base material. Measuring probe: Measuring range depending on the probe on steel and iron up to 3000 µm. With probe DX1-F, DX1-FT or DX6-FT. |
|
| more info | more info | |
|
Coating thickness gauges for finding the extreme points Scan measurement and analog measurement help you to determine the minimum and maximum layer |
||
|
MEGA-CHECK  |
||
| Depending on the probe selected, measurement of paint, varnish, plastic and galvanic layers on steel, measurement of insulating layers on non-ferrous metals with automatic detection of the base material. Measuring probe: Measuring range depending on the probe on steel and iron up to 30 mm (30,000 µm), on NFE metals up to 2 mm (2000 µm). |
||
| more info | ||
|
Caution, wet! Splashing water, or even running water? Oily vapors? Answers for harsh environments. |
||
|
TOP-CHECK  |
||
| For measuring paint, varnish, plastic and galvanic coatings on steel (ISO 2178). For measuring insulating layers on non-ferrous metals (ISO 2360) with automatic detection of base material. Measuring probe: can be swiveled by 90°. Protection according to IP64, with additional post-treatment up to IP67. |
||
| more info | ||
|
Statistical values Evaluation of measurement series according to number, minimum, maximum, mean value and standard deviation |
||
|
TOP-CHECK  |
TOP-CHECK Ferro-1000  |
MEGA-CHECK  |
| For measuring paint, varnish, plastic and galvanic coatings on steel (ISO 2178). For measuring insulating layers on non-ferrous metals (ISO 2360) with automatic detection of base material. Measuring probe: can be swiveled by 90°. Model Dual or Ferro |
For measuring paint, varnish, plastic and galvanic layers on steel (ISO 2178). With spring-loaded measuring probe. Model Ferro-1000 |
Depending on the probe selected, measurement of paint, varnish, plastic and galvanic layers on steel, measurement of insulating layers on non-ferrous metals with automatic detection of the base material. Measuring probe: Measuring range depending on the probe on steel and iron up to 30 mm (30,000 µm), on NFE metals up to 2 mm (2000 µm). |
| more info | more info | more info |
|
Data logger Storage of measured values and statistical evaluation according to number, minimum, maximum, mean value and standard deviation |
||
|
TOP-CHECK  |
TOP-CHECK Ferro-1000  |
MEGA-CHECK  |
| For measuring paint, varnish, plastic and galvanic coatings on steel (ISO 2178). For measuring insulating layers on non-ferrous metals (ISO 2360) with automatic detection of base material. Measuring probe: can be swiveled by 90°. Model Dual or Ferro, 4000 values |
For measuring paint, varnish, plastic and galvanic layers on steel (ISO 2178). With spring-loaded measuring probe. Model Ferro-1000, 4000 values |
Depending on the probe selected, measurement of paint, varnish, plastic and galvanic layers on steel, measurement of insulating layers on non-ferrous metals with automatic detection of the base material. Measuring probe: Measuring range depending on the probe on steel and iron up to 30 mm (30,000 µm), on NFE metals up to 2 mm (2000 µm). |
| more info | more info | more info |
|
Interfaces Transfer of the data to a PC or mobile Android / iOS device |
||
|
TOP-CHECK  |
TOP-CHECK Ferro-1000  |
MEGA-CHECK  |
| For measuring paint, varnish, plastic and galvanic coatings on steel (ISO 2178). For measuring insulating layers on non-ferrous metals (ISO 2360) with automatic detection of base material. Measuring probe: can be swiveled by 90°. Model Dual or Ferro via wireless interface to Windows PC and Android / iOS |
For measuring paint, varnish, plastic and galvanic layers on steel (ISO 2178). With spring-loaded measuring probe. Model Ferro-1000 via wireless interface to Windows PC and Android / iOS |
Depending on the probe selected, measurement of paint, varnish, plastic and galvanic layers on steel, measurement of insulating layers on non-ferrous metals with automatic detection of the base material. Measuring probe: Measuring range depending on the probe on steel and iron up to 30 mm (30,000 µm), on NFE metals up to 2 mm (2000 µm). via wieless interface to Windows PC. |
| more info | more info | more info |
|
Calibration memory Storing the calibration base line of zero calibration and foil calibration |
||
|
TOP-CHECK  |
TOP-CHECK Ferro-1000  |
MEGA-CHECK  |
| For measuring paint, varnish, plastic and galvanic coatings on steel (ISO 2178). For measuring insulating layers on non-ferrous metals (ISO 2360) with automatic detection of base material. Measuring probe: can be swiveled by 90°. The last calibration is retained. |
For measuring paint, varnish, plastic and galvanic layers on steel (ISO 2178). With spring-loaded measuring probe. The last calibration is retained. |
Depending on the probe selected, measurement of paint, varnish, plastic and galvanic layers on steel, measurement of insulating layers on non-ferrous metals with automatic detection of the base material. Measuring probe: Measuring range depending on the probe on steel and iron up to 30 mm (30,000 µm), on NFE metals up to 2 mm (2000 µm). unlimited number of calibrations can be stored in the device, with comment text input |
| more info | more info | more info |


